Bathroom Layout Ideas | Plan a Space That Works
Explore proven Bathroom Layout Ideas tailored to your room size, traffic flow, and daily routines—plus smart tips for clearances, wet walls, and storage. Contact Simone Feldman Designs today.
Bathroom Floor Plans by Size and Traffic Flow
A bathroom that functions beautifully starts long before tile is chosen. The best layouts come from careful measuring, understanding how the room is used, mapping plumbing and electrical, and sequencing decisions so the floor plan supports your routine and future needs.
For homes and condos in Roswell, Atlanta, and nearby neighborhoods, a thoughtful layout reduces morning bottlenecks and maximizes every inch. While each bath is unique, effective planning typically follows clear steps: discovery, space analysis, floor-plan options, fixture sizing, clearance checks, wet-wall strategy, and a final layout that aligns with budget and style.
Simone Feldman Designs leads homeowners through each decision. With more than 40 years in renovation and design, Simone brings precise measurements, practical insight, and clear communication to bathroom planning. As a Certified Kitchen and Bath Designer (CKBD) and Certified Aging-in-Place Specialist (CA
How Long Does Bathroom Layout Planning Take?
Creating a functional bathroom layout can be completed quickly for straightforward rooms, but more complex spaces benefit from extra time to test clearances, traffic flow, and plumbing constraints before any work begins.
Compact hall baths with standard fixtures often need fewer revisions than larger primary suites. Layouts that introduce a separate water closet, move the tub or shower, add a double vanity, or shift wet walls require deeper evaluation to confirm code clearances, door swings, and fixture spacing.
Key factors that influence the planning timeline include:
- Overall room size and current fixture placement
- Whether multiple bathrooms share a plumbing stack
- Changes to the floor plan or wet-wall locations
- Plumbing or electrical relocation feasibility
- Permit considerations tied to layout changes
- Fixture sizes and availability (e.g., custom vanities)
- Custom cabinet dimensions and door/drawer clearances
- Shower footprint, entry orientation, and waterproofing zone
- Glass enclosure measurements and lead times
- Hidden structural elements discovered during site review
- Coordination with trades to validate rough-in requirements
Rather than focusing on speed alone, prioritize accuracy. Upfront layout work—confirming door and circulation clearances, verifying double-vanity spacing, and aligning fixtures to existing stacks—prevents rework and helps the build phase proceed smoothly.


Define Priorities Room Size and Traffic Paths
The best Bathroom Layout Ideas start with how you live: who uses the space, when it’s busiest, and what feels cramped today.
During the initial consultation, Simone Feldman Designs studies your footprint and discusses how the plan should function. Common topics include circulation pinch points, tight door swings, insufficient vanity space, privacy for the toilet, awkward shower entry, and how to position fixtures near existing plumbing to save cost.
This stage is also the time to define the layout priorities. Homeowners should be prepared to share:
- Photos or inspiration showing preferred floor plan concepts
- A ranked list of must-haves (e.g., double vanity, water closet, larger shower)
- Household usage patterns—kids, guests, or aging-in-place needs
- Budget parameters that influence moving vs. keeping fixtures
- Whether the bathroom will stay within its current footprint
- Any known moisture or leak history that may affect wall locations
- A target completion window, if applicable
A clear conversation early on sets expectations and reveals which layout choices—like a split-bath plan or pocket door—will deliver the greatest daily comfort and long-term value.
Measure Clearances Wet Walls and Plumbing Stack
Before choosing finishes, establish a floor plan that respects code and comfort. This step evaluates dimensions, door and window placement, existing wet walls, ceiling height, natural light, and how traffic flows through the room.
Bathroom space planning reaches beyond “will it fit?” and focuses on “will it work?”—ensuring users can move, share the room, and access storage without conflict.
A strong bathroom plan may consider:
- Door swing, pocket door options, and entry clearances
- Toilet privacy or a separate water closet (pros/cons by footprint)
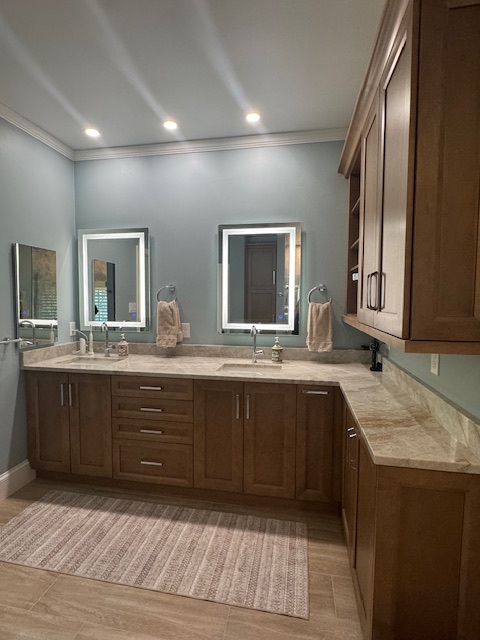
- Vanity width, sink spacing, and double-vanity centerline clearances
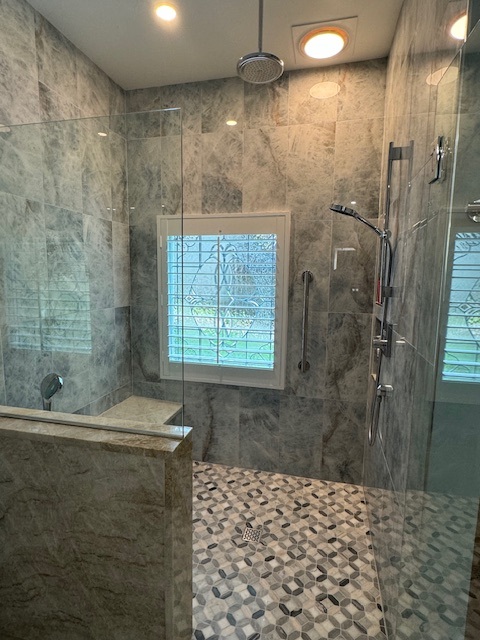
- Shower size, entry orientation, and adjacency to a wet wall
- Tub location if included, and its effect on circulation
- Fixture clearances for comfortable use and code compliance
- Window placement vs. mirror walls for daylight and privacy
- Linen and towel storage within reach of the wet zone
- Convenient outlet placement at the vanity
- Exhaust routing noted for coordination, without deep detail here
- Layered lighting locations referenced for later selection
- Accessibility and future mobility, such as wider paths or pocket doors
In smaller baths common in Roswell bungalows and Atlanta condos, a two-wall wet zone, a pocket door, a shallow-depth vanity, or a mirrored medicine cabinet can open circulation without moving walls.
For larger primary suites, consider a three-wall wet zone for efficient plumbing, a double vanity with adequate elbow room, a defined water closet, and logical linen storage to keep counters clear.
Simone Feldman Designs uses 3D visuals to compare options—standard vs. split-bath, windowed vs. interior layouts—so you can evaluate scale, clearances, and fixture placement before finalizing.
Refine the Plan Fixture Sizes and Double-Vanity Spacing
With a preferred floor plan selected, Simone refines dimensions and confirms each fixture’s size so the layout performs as drawn, day after day.
Selections may include:
- Vanity width and depth, sink count, and drawer configurations
- Countertop overhangs that preserve aisle clearances
- Sink and faucet sizes that fit mirror and splash zones
- Shower footprint and trim locations aligned to entry
- Bathtub size, if used, relative to window and circulation
- Toilet model and rough-in compatible with the plan
- Tile formats that support slopes and alcove dimensions
- Niche placement coordinated with stud bays
- Grout lines aligned to visual axes
- Mirror and medicine cabinet sizing for shared use
- Lighting junctions aligned with sink centerlines
- Fan placement noted for coordination (kept high-level here)
- Threshold transitions that maintain flush movement paths
- Towel bars and paper holders located within reach zones
- Shower glass sizing that respects door swing and towel reach
Every choice should reinforce the floor plan: for example, double-vanity centers should allow at least 36 inches of sink-to-sink spacing for comfort, and doors should maintain clear paths of travel. In compact spaces, a single wider sink may outperform two cramped bowls.
Confirming sizes early prevents conflicts with window placement, plumbing rough-ins, and glass fabrication. Right-sizing cabinetry and fixtures keeps circulation clear and the room easy to share.
Simone helps you align fixture sizes, storage, and layout details with your home, budget, and schedule—so your bathroom works seamlessly from the first day you use it.
Budget Permits and Ordering for Your Layout
Once your preferred bathroom layout is selected—whether a classic single-room plan or a split-bath with a separate water closet—Simone refines the floor plan and verifies measurements against real-world clearances. With the layout locked, our team finalizes pricing tied to plumbing locations, wet-wall routing, door swings, and fixture spacing so you know exactly what your chosen plan entails.
Sequencing is essential: if a layout relies on specific fixtures (for example, a compact double vanity or an in-wall tank for a tighter water closet), availability can influence when we open walls. Beginning demolition before confirming these items can leave you without a functioning bath for longer than necessary.
Depending on the layout, the planning stage may include:
- Confirming labor tied to plumbing and electrical reconfiguration
- Ordering vanities, toilets, shower systems, lighting, and countertops sized to the floor plan
- Reviewing product lead times for layout-dependent items
- Coordinating specialty components like pocket doors or low-profile drains
- Finalizing plumbing and electrical rough-in locations for the selected layout
- Scheduling trades to match the plan sequence (framing, plumbing, electrical)
- Applying for permits, when required
- Preparing for inspections of framing, plumbing, and electrical rough-ins
- Establishing a start date aligned with confirmed materials
Some layout changes—moving a toilet to a new wet wall, adding a separate water closet, or shifting door openings—trigger permits and inspections. Review times can affect your schedule, especially for plans that relocate plumbing stacks or add circuits for lighting and heated floors.
At Simone Feldman Designs, we coordinate the right specialists for your chosen layout and confirm that on-site decisions support optimal traffic flow, clearances, and code compliance. Simone partners with experienced carpenters, plumbers, electricians, tile installers, and other pros so the built result matches the approved plan.
Prep the Space Doors Pocket Doors and Protection
Before work begins, prepare for short-term layout disruptions—particularly if the plan repositions fixtures and requires additional rough-in time. If this is your only full bath, arrange a temporary setup for daily routines like brushing teeth, makeup, and shaving while the new floor plan takes shape.
Preparation may include:
- Removing toiletries, medications, towels, and décor
- Clearing hallways for moving larger fixtures, vanities, and glass
- Relocating fragile items from adjacent rooms
- Creating a temporary grooming station with mirror and task lighting
- Planning bathroom use around scheduled water shutoffs
- Discussing pet access and household schedules
- Protecting nearby furniture from dust and vibration
- Confirming parking, entry, and access expectations with the project team
Expect dust, noise, and brief utility interruptions as we frame new openings, reroute plumbing to the designated wet wall, and adjust electrical for revised lighting. Our team outlines the sequence so you know which trades are onsite and how each step advances the selected layout.
Simone remains actively involved during construction, visiting the site to verify clearances at doorways, vanities, and circulation paths, and keeping you updated on progress and any refinements that improve function.
Rough-In Plumbing Electrical and Wet Walls
Demolition marks the transition from ideas to reality. We remove existing fixtures, vanities, flooring, and finishes to make way for the optimized floor plan—whether it’s a two-wall wet zone for efficiency or a three-wall configuration to separate shower and tub areas.
Once walls are open, we may uncover concealed issues that influence layout execution: water damage at former wet areas, undersized venting, uneven subfloors that affect shower pitch, or outdated wiring where new sconces or a double vanity require dedicated circuits.
Not every bath reveals surprises, but it’s wise to include contingency time and budget. Correcting subfloor or framing irregularities now helps doors swing freely, glass align cleanly, and fixtures fit within planned clearances.
After demolition, rough construction may include:
- Framing changes for pocket doors or resized water closet partitions
- Plumbing rough-ins aligned with the chosen wet wall(s)
- Electrical wiring for mirror lighting, outlets, and code-required clearances
- Ventilation ducting as required for the new room configuration
- Blocking for future accessories, grab bars, cabinets, or shower glass
- Shower pan preparation to suit the layout’s drain location
- Wall repairs or replacement to square the room for tile alignment
- Subfloor repairs and leveling for flat, creak-free finishes
This stage determines how well your final layout performs—doorways clear, vanities centered, wet areas contained, and every fixture comfortably spaced for daily use.
Waterproofing Shower Pans and Alcoves
Effective bathroom layouts keep moisture where it belongs. Whether your plan concentrates plumbing on two walls or distributes it across three, robust waterproofing at showers and tub surrounds is essential. Tile and grout are finishes; the real protection is the continuous waterproofing behind and beneath them, coordinated to your drain and niche locations.
Depending on the bathroom design, this phase may involve:
- Installing a waterproof shower pan or system sized to the planned footprint
- Preparing shower walls to align with niches and bench positions
- Applying waterproofing membranes across all wet zones
- Conducting flood testing when appropriate
- Installing floor tile with proper transitions at door clearances
- Setting wall tile and shower tile for clean sightlines from the entry
- Grouting and sealing materials as needed
- Installing a vanity and countertop centered to plumbing rough-ins
- Completing flooring transitions for smooth circulation paths
- Painting walls and ceilings
Intricate tile layouts—mosaics, feature walls, or large-format materials—require precise planning so grout lines align with vanity centers, mirror edges, and shower glass. Patience here protects drainage, walls that are true, and the crisp geometry your layout promises.
Simone Feldman Designs coordinates skilled trades to ensure the built environment reflects the floor plan—wet areas correctly contained, clearances maintained, and hidden waterproofing executed to spec—so the finished room both looks right and functions flawlessly.
Set Fixtures Vanities and Final Clearances
With surfaces complete, the layout comes to life. This is when fixture placement, mirror height, and lighting aim reinforce the traffic flow and usability envisioned in the plan—especially around double vanities and door swing zones.
Typical finishing work may include:
- Installing faucets, shower trim, and toilets in their planned clearances
- Hanging mirrors and light fixtures to balance sink spacing
- Connecting sinks and drains at centered rough-ins
- Installing cabinet hardware placed for comfortable reach
- Mounting accessories where circulation remains unobstructed
- Installing shower glass sized to the final curb and wall geometry
- Completing paint touch-ups
- Testing lights, outlets, fans, drains, and plumbing fixtures
- Cleaning the space for final review
Because custom glass is templated after tile, expect a short gap before installation. This ensures perfect reveals at benches, niches, and half-walls defined by your chosen layout.
Punch List Venting Lighting and Finishes
The final walkthrough confirms that the plan works as intended: doors clear vanities, the toilet area is comfortable, and wet zones are contained without splash paths crossing circulation. Together we verify function, fit, and finish before you begin daily use.
During the final review, homeowners should understand:
- How to operate plumbing fixtures and exhaust fans
- How to care for countertops, tile, grout, and specialty surfaces
- Whether any materials require sealing or specific cleaners
- How to maintain shower glass and hardware
- What warranty information applies to products or workmanship
- Which final touch-ups or punch-list items, if any, remain
A thorough walkthrough ensures you’re confident in the layout—where everything is placed, how traffic flows, and how to keep the room performing beautifully over time.
What Can Change Your Layout Timeline
Bathroom layouts vary by footprint, plumbing access, and the need for privacy. Even a well-planned project can shift if the layout changes midstream, inspection dates move, or a key fixture for a narrow alcove or water closet is delayed.
Common reasons a bathroom remodel may take longer include:
- Revising the floor plan after rough-ins are complete
- Delayed vanities, shower systems, lighting, or specialty toilets
- Backordered or damaged layout-critical materials
- Custom fabrication lead times for countertops or shower glass
- Permit and inspection scheduling for plumbing or framing changes
- Hidden issues uncovered when moving wet walls or doors
- Structural work to widen doorways or add a partitioned water closet
- Complex tile alignment to suit centered vanities and feature walls
- Weather-related challenges affecting deliveries or exterior access
- Homeowner selection changes that alter fixture spacing or clearances
To keep your schedule on track, confirm the layout early, order critical components before demolition, maintain a realistic contingency, and partner with Simone—who coordinates trades so rough-ins, inspections, and finishes proceed in the right sequence.
Bathroom Layout Checklist and Sample Floor Plans
Choosing a bathroom layout is about more than fitting in a tub and a sink—it’s about traffic flow, clearances, and how you use the space every day. A smart floor plan places fixtures on shared wet walls, keeps doors and drawers from colliding, and reserves the right amount of room around toilets, vanities, and showers so the room feels comfortable and safe to move through.
Simone Feldman Designs helps homeowners in Roswell, Atlanta, and nearby neighborhoods map out functional bathroom layout ideas for real homes and condos. With more than 40 years of residential design experience, Simone provides hands-on guidance for floor plan options—standard vs. split-bath layouts, two-wall vs. three-wall wet zones, double-vanity spacing, and water closet placement—while coordinating materials, trades, and on-site details that make the plan work in the field.
If you’re exploring layout options for a bathroom remodel, contact Simone Feldman Designs to schedule a consultation and develop a clear, build-ready plan that fits your space and daily routine.