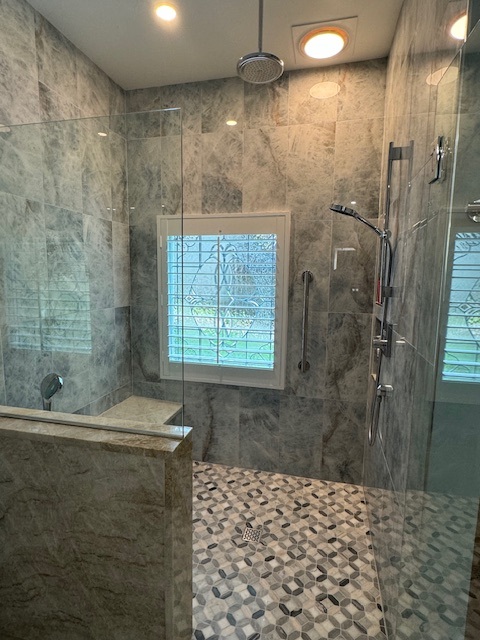
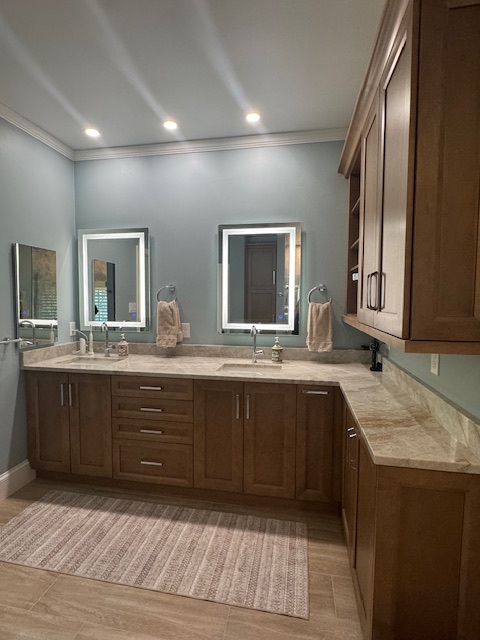
Bathroom Vanity Guide: What to Know Before You Buy
Explore the essentials of choosing a bathroom vanity—from sizing and configuration to countertops, sinks, faucets, and lighting alignment. Contact Simone Feldman Designs today.
Bathroom Vanity Guide: Key Decisions From Start to Finish
A great vanity starts long before installation day. Smart projects begin with careful measuring, reviewing plumbing rough-ins, comparing storage needs, selecting countertop and sink types, confirming faucet spreads, and coordinating mirrors and sconces for ideal sightlines.
For homeowners in Roswell, Atlanta, and nearby neighborhoods, understanding these choices makes selecting a vanity far less stressful. While every bathroom is different, most decisions follow a clear path: measure the space, confirm plumbing and electrical clearances, choose single vs. double sizing, pick freestanding or floating, select countertop and splash details, finalize sink style and faucet configuration, and plan mirror and lighting placement.
Simone Feldman Designs helps homeowners navigate each step with confidence. With more than 40 years in bathroom design, Simone brings precise measurements, product expertise, and transparent guidance to vanity selection and coordination. As a Certified Kitchen and Bath Designer (CKBD) and Certified Aging-in-Place Specialist (CA
How Long Does Selecting and Installing a Vanity Take?
Choosing and installing a vanity can be completed quickly, but the full process typically includes measuring, plumbing verification, product selections, ordering, and coordination with countertop fabricators and electricians.
A straightforward swap with a same-size vanity may move faster than a full update that adds a double sink, floating mount, new countertop, or altered plumbing. Projects that involve faucet spread changes, custom cabinetry, quartz templating, or mirror and sconce repositioning require more planning and can extend timelines.
Your vanity timeline can also be affected by:
- Bathroom size and existing rough-in locations
- Single vs. double vanity conversion
- Freestanding vs. floating mounting requirements
- Faucet spread and sink style changes
- Mirror and sconce relocation
- Product availability and lead times
- Custom cabinet or top fabrication
- Backsplash or side-splash details
- Scheduling for countertop templating and install
- Hidden issues behind existing cabinetry
- Trade coordination for plumbing and electrical
Instead of focusing only on installation day, consider the full lifecycle: accurate measurements, early selections, and confirmed rough-ins help prevent last-minute changes, stray holes in walls, or faucet/sink mismatches once work is underway.


Phase 1: Needs Assessment and Sizing Strategy
Your vanity planning starts with a conversation about how you use the bath, who uses it, and the storage and counter space you truly need.
During the initial discussion, Simone Feldman Designs evaluates your room and talks through everyday routines. Common concerns include not enough drawer space, countertop clutter, awkward faucet reach, mirrors at the wrong height, poor lighting at the sink, or a vanity that blocks door swing or hampers traffic flow.
This stage is also the time to outline the project scope. Homeowners should be prepared to share:
- Inspiration photos and finish preferences
- A prioritized list of storage needs
- Users and goals (kids, guests, aging-in-place)
- Budget parameters
- Whether you want single or double sinks
- Known plumbing constraints or moisture issues
- Any timing considerations
Clear expectations early help determine vanity width and depth, drawer vs. door balance, and whether a single or double configuration best supports daily use.
Phase 2: Configuration, Mounting, and Rough-In Review
Before choosing finishes, confirm how the vanity will fit and function. This phase reviews wall-to-wall dimensions, door and window placement, plumbing rough-ins, P-trap clearance, venting, lighting outlets, and storage opportunities.
Smart vanity planning goes beyond where a cabinet sits. It considers usable counter space, knee and toe clearance, drawer access, and how mirrors and sconces align with eye level for glare-free lighting.
A strong vanity plan may include:
- Door swing and traffic clearances around the sink
- Privacy and spacing near the toilet
- Vanity width, depth, and drawer/door configuration
- Freestanding vs. floating installation details
- Countertop overhang, backsplash, and side-splash needs
- Faucet spread (centerset, mini-widespread, widespread)
- Sink type (undermount, vessel, integrated) and bowl placement
- Electrical outlet and sconce height/spacing
- Mirror size and alignment with faucet and sink centerlines
- P-trap location, shutoff valve access, and trap-arm slope
- Accessibility or seated-use considerations
In compact baths, a floating vanity can visually open the room and simplify cleaning, while a shallow-depth cabinet or offset sink can add maneuvering space without moving walls.
In larger primary baths, you might consider a double vanity with separated sinks, a makeup knee space, tall linen towers, or furniture-style legs with a functional toe-kick for comfort.
Simone Feldman Designs uses 3D visuals to show proportions, drawer layouts, faucet alignment, and mirror/sconce spacing so you can confirm everything before ordering.
Phase 3: Materials, Countertops, Sinks, and Faucets
With the layout set, focus shifts to performance and look. This is where you lock in cabinet finishes, top materials, sink style, faucet spread, and splash details.
Selections may include:
- Vanity cabinetry, finish, and hardware
- Quartz, quartzite, marble, or solid-surface countertop
- Undermount, vessel, or integrated sink
- Faucet style and spread (4-inch centerset, mini-widespread, 8-inch widespread)
- Mirror size and medicine cabinet type
- Sconce style and placement
- Side-splashes and backsplash height
- Drawer organizers and interior outlets
- Decorative toe-kick or floating bracket system
- Finish coordination with nearby shower and accessories
Every choice should support daily use and maintenance. For example, quartz offers durability and stain resistance, while marble brings timeless character but needs more care. An undermount sink maximizes counter wipe-down, whereas a vessel sink creates a sculptural focal point but demands careful faucet height and splash control.
Ordering early is essential: custom cabinetry, quartz fabrication, specialty faucets, and mirrored medicine cabinets may have lead times. Securing these items before installation day keeps the project on track.
Simone helps you compare countertop performance, select the right sink and faucet pairing, and fine-tune mirror and sconce spacing so your vanity looks beautiful and works flawlessly.
Selecting, Ordering, and Scheduling Your Vanity
Once you’ve chosen a vanity style, size, sink configuration, and countertop, Simone helps lock in accurate pricing, confirm the installation scope, place orders, and build a dependable installation timeline for your bathroom.
Availability of vanities, tops, and faucets directly impacts when your old vanity can be removed. Demolition before your new components are confirmed may leave you without a functional sink longer than necessary.
Depending on the vanity plan, preparation often includes:
- Confirming labor, delivery, and installation costs
- Ordering the vanity cabinet, countertop, sink(s), faucet(s), and mirror(s)
- Reviewing lead times for tops, custom widths, and finishes
- Coordinating specialty items like floating braces or integrated backsplashes
- Finalizing plumbing rough-in locations and electrical needs for sconces
- Scheduling trades for removal, plumbing, electrical, and finish carpentry
- Applying for permits when plumbing or electrical changes are required
- Preparing for any needed inspections related to rough-in adjustments
- Setting an install date based on confirmed product arrivals
Permits aren’t needed for every vanity upgrade, but they may be required when relocating supply lines, drains, outlets, or lighting. Review and inspection timing can influence your schedule, especially if the vanity layout shifts from a single to a double or from freestanding to floating.
At Simone Feldman Designs, we coordinate plumbers, electricians, countertop fabricators, and installers so the vanity plan translates cleanly from drawings to real-world placement, clearances, and connections.
Preparing Your Bathroom for a Vanity Upgrade
Before installation, plan for brief disruption to daily routines. If the vanity sink is your primary grooming station, set up a temporary area for handwashing, brushing teeth, and storage.
Preparation may include:
- Clearing toiletries, medications, towels, and décor from the vanity
- Opening access paths for moving the old and new cabinets
- Relocating fragile items from adjacent rooms
- Setting up a temporary grooming station with a mirror and caddy
- Planning around short water shutoffs during plumbing reconnections
- Discussing pet access and household schedules during install hours
- Protecting nearby furniture and flooring
- Confirming parking, entry, and access with the installation team
Expect noise, brief water interruptions, and foot traffic. A professional team should outline the timeline, explain when plumbing and electrical work occur, and note when you can resume normal use.
Simone stays involved throughout installation, visits site as needed, and keeps you informed about progress, next steps, and any adjustments affecting the schedule.
Removal, Rough-In, and Structural Prep
Vanity replacement starts with removing the existing cabinet, countertop, mirror, and any splash details to make room for the new configuration.
Once removal begins, hidden issues may appear: water damage around the P-trap, aging shutoff valves, uncentered drains, uneven floors, or wall irregularities that affect a floating or wall-hung unit.
Not every project encounters these conditions, but build in a small contingency for timing and cost. Correcting rough-in and substrate issues ensures your new vanity sits level, the drawers clear plumbing, and the faucet and mirror align properly.
After removal, rough preparation may include:
- Adjusting wall framing or adding blocking for floating vanities
- Resetting plumbing rough-ins for sink location and P-trap clearance
- Positioning electrical for sconces, outlets, and mirror lighting
- Adding bracing for heavy stone countertops or tall linen towers
- Leveling and shimming to achieve proper cabinet alignment
- Repairing and prepping walls for backsplash or side splashes
- Refining floor transitions at toe-kicks or open-bottom designs
- Verifying faucet spread and drain centerlines before top fabrication
This stage is critical because accurate rough-in and support determine how well drawers function, how neatly plumbing fits behind doors, and how perfectly the mirror, sconces, and faucet line up in the finished space.
Countertops, Splash Details, and Cabinet Installation
For a durable and low-maintenance vanity, the countertop and splash strategy matter as much as the cabinet. Stone and quartz resist moisture, but proper fabrication, sealing (if required), and tight plumbing penetrations are key to keeping water out of the cabinet below.
Depending on your selection, this phase may involve:
- Templating or measuring for a quartz, stone, or solid-surface top
- Fitting side and rear splashes to protect walls and seams
- Cutting faucet holes to match single-hole, centerset, or widespread spreads
- Setting the base cabinet or mounting a floating vanity to blocking
- Dry-fitting undermount or vessel sinks
- Sealing stone per manufacturer guidance, when applicable
- Aligning drawer clearances with P-traps and shutoff valves
- Painting or touching up walls behind the splash line
Precise fabrication prevents drips from pooling at the backsplash and ensures clean lines where mirrors, sconces, and side splashes meet. Rushing can lead to misaligned holes, visible gaps, or tops that aren’t level—issues that are hard to correct later.
Simone Feldman Designs coordinates fabricators and installers, confirming sink centerlines, faucet spreads, and splash heights so the finished vanity looks seamless and functions beautifully.
Sinks, Faucets, and Hardware Fit-Out
With the cabinet and top in place, the space begins to function. This is when visible fixtures and fine details complete the vanity setup.
Typical finishing work may include:
- Installing faucets to match your selected spread and spout reach
- Mounting mirrors and spacing sconces for comfortable face illumination
- Setting undermount or vessel basins and connecting drains
- Adding cabinet hardware for smooth drawer and door operation
- Mounting accessories like towel rings and shelves
- Final silicone and caulk at splash and sink perimeters
- Testing shutoffs, drains, traps, outlets, and lighting
- Cleaning and polishing surfaces for handover
Note that certain mirrors and glass accessories are best sized after the countertop and splash are installed. This sequencing allows exact alignment with the faucet and sconce centerlines for a tailored look.
Final Review of Your Vanity Installation
The walkthrough with your installer and Simone confirms that everything operates properly and that the layout matches the approved plan—centerlines, heights, clearances, and finishes.
During the review, you’ll learn:
- How to operate and maintain your faucet and shutoff valves
- Best practices for caring for quartz, stone, and solid-surface counters
- Which sealers or cleaners are recommended for your materials
- How to keep mirrors, hardware, and finishes spot-free
- What product and workmanship warranties apply
- Any remaining touch-ups or punch-list items
A thorough walkthrough ensures your new vanity is comfortable to use, simple to maintain, and aligned with the rest of your bathroom design.
What Can Change a Vanity Installation Timeline
Even a straightforward vanity project has variables. Lead times, on-site discoveries, and fixture choices can influence when your new vanity is ready for daily use.
Common reasons a vanity project may take longer include:
- Changing from single to double sinks or altering the cabinet width
- Delayed delivery of the cabinet, countertop, faucet, or mirror
- Backordered or damaged tops, bowls, or hardware
- Custom fabrication time for quartz cutouts, splashes, or integrated sinks
- Permit and inspection timing for plumbing or electrical changes
- Hidden conditions such as valve failures, off-center drains, or wall damage
- Structural blocking required for floating vanities
- Complex faucet spreads, vessel sink heights, or unique sconce spacing
- Weather impacting large countertop deliveries or access
- Homeowner specification changes after orders are placed
To minimize delays, make selections early, confirm faucet spreads and sink types before templating, order critical items in advance, and work with Simone to coordinate rough-ins, fabrication, and installation from planning to final polish.
Choose the Right Vanity With Confidence
Selecting a bathroom vanity shapes how your space functions every day. The best choice balances width and storage with door clearances, plumbing rough-ins, and traffic flow. A thoughtful plan looks beyond style—confirming sink type, faucet spread, countertop overhang, and P-trap clearance—so the vanity you love also installs smoothly and lasts.
Simone Feldman Designs offers homeowners in Roswell, Atlanta, and nearby neighborhoods expert guidance on bathroom vanities—from single vs. double sizing and freestanding vs. floating configurations to quartz, stone, or solid-surface countertops, backsplash details, mirror sizing, and sconce spacing. With more than 40 years in residential design, Simone coordinates selections with plumbing locations, ensures correct heights for vessel or undermount sinks, and aligns hardware, drawers, and outlets with real-world use.
If you are comparing vanity options, contact Simone Feldman Designs to schedule a consultation and receive a clear, customized plan for your bathroom vanity, plumbing, countertop, mirror, and lighting pairings.